Here's how this week's lessons can help you address DCIs. The newest lessons: Safari Vehicle and Comparing Skulls are designed to engage your students in problem solving and critical thinking! 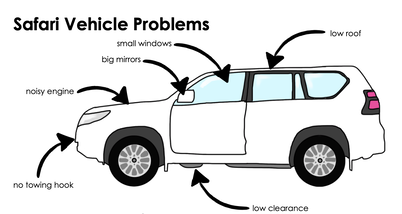 Day 7: Build a Better Safari Vehicle challenges students to design an improved vehicle. You can use classroom construction toys, cardboard, or even 3D printing to create the ultimate ride. Along the way students can get experience with the standards listed below. Your questions can help steer the conversations to focus on the standards you choose:
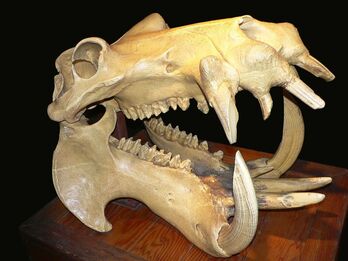 Day 8: Comparing Skulls As with the previous lesson, teacher questions can steer conversations towards the standards you choose! Encourage students to articulate their observations. How are these skulls alike and different? How does the shape of each animal's head effect how it eats or defends its territory? What features are surprising? Do they have anything in common with either animal? The conversations are nearly endless!
0 Comments
Look who's talking!
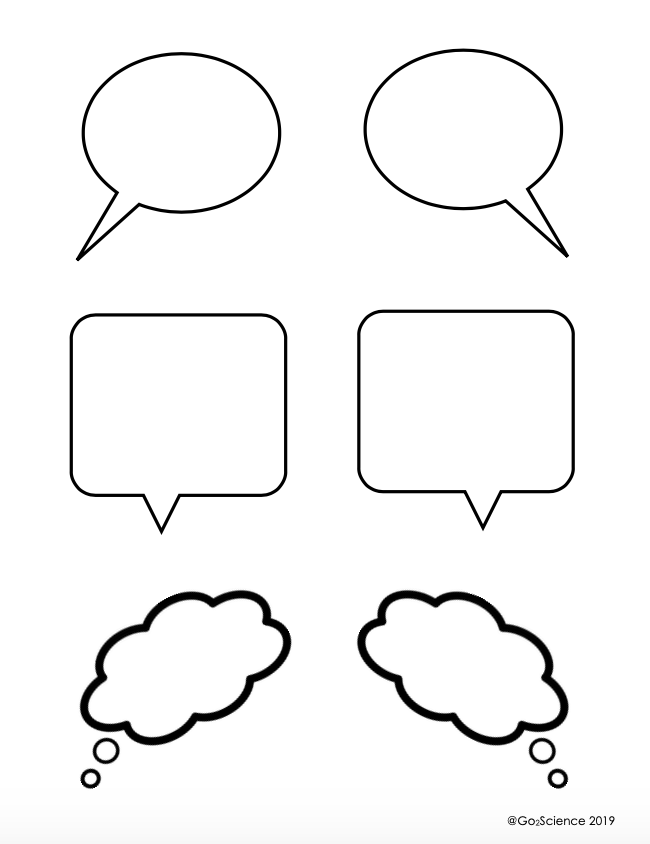
PreK: Focus on metacognition. I think: Thinking about thinking, or metacognition, can be a powerful educational strategy. But first students must be aware that they are thinking! Have students draw what they are thinking in a thought bubble. Then have them tell you what they are thinking. Record their dictation in a speech bubble. Take it to the next level by displaying the speech and thought bubbles with pictures of the students so it looks like they are thinking and speaking.
Grades 1 and 2: Focus on sentences.
What would the box say? Take a moment to identify a few inanimate objects in your classroom. What if the pencils, clock, or chairs could talk? What would they say? What would they think? Challenge students to write one sentence that they imagine one of these objects might think or say. It's only a sentence so it's a great chance to revise and shoot for perfect spelling, punctuation, and grammar. When their sentence is just right, allow students to carefully copy the sentence onto a printable post it and display it by their object. For added fun, invite the principal or a buddy class in to find the post it speech bubbles. Then have either the author or finder read it aloud...remember to read it in character! Let's think of something to do while we're waiting!
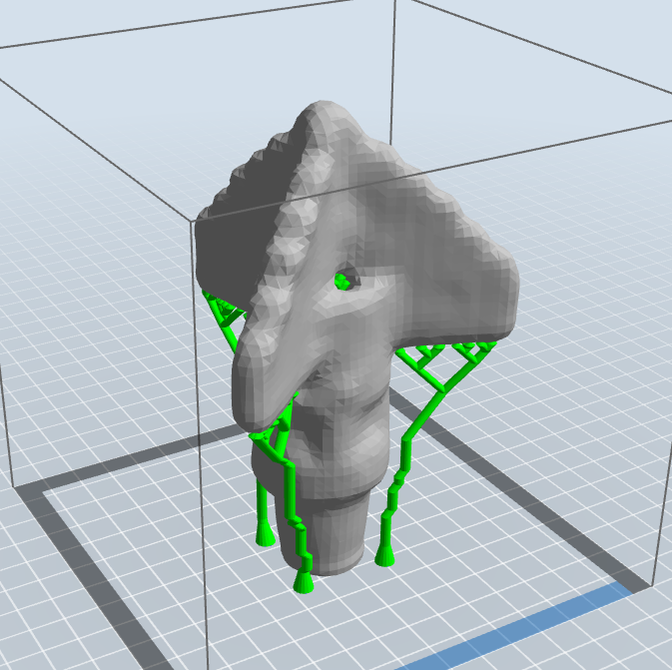
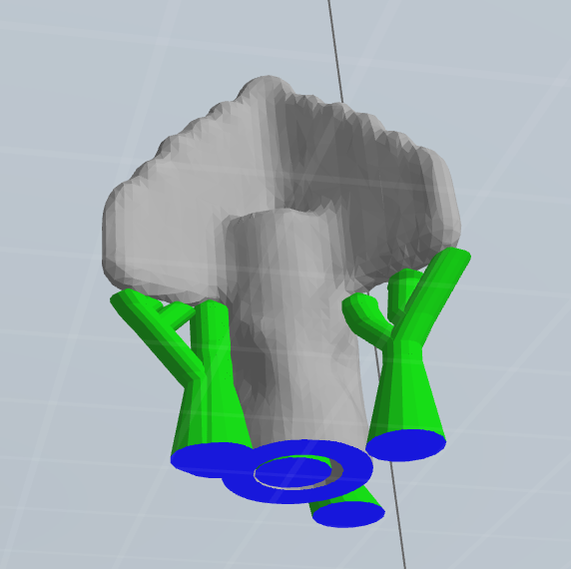
Different bits for different jobs!The drill rig came equipped with two types of drill bits for different types of rocks and conditions. Just looking at them makes me want to bust out the Venn diagrams! I'll let you save that for your students and focus my discussion of similarities and differences on the printing process. Both drill bits print well in standard quality with the business end oriented skyward. Drill Bit One, however, needs some tree-like supports. We've also provided a mini version of Drill Bit One that fits over the tip of a standard sized pencil turning it into a mini drill rod! The mini version also needs tree like supports. A pair of needle nose pliers makes removing the support from the hole in the center an easy task.
If you are still in the mood for those Venn diagrams, simply click the button below for a triple Venn diagram! Happy comparing!
Fold and go mini-journal for science on the go!
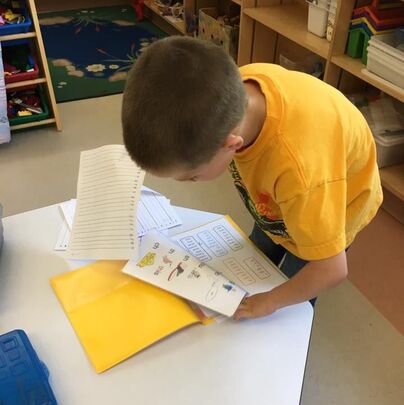
Spend more time writing and less time managing!
 Pre-bound journals: I really tried to make these work early in my career. It seemed like the best way to keep random papers from floating about the classroom. I tried binding them several different ways and they were super cute but I'd always get one or more enthusiastic "writers" who enjoyed filling pages and my system would fall apart. One student even went through and put a line on each page simply to fill the journal! With work, I could get many students to fill one page before moving on to the next. There were always those students with perfectionist tendencies. If they "messed up" they could have a hard time moving on without removing the offending page from their journals! Report Covers: These worked better than the pre-bound journals as I could add or arrange pages as needed, but the flexible bindings ultimately met with mechanical failure leading to a jumble of pages! Plus, for kinders anyway, they were not a kid friendly technology so much of the management fell to me. It was not a great way to foster independence. Folders: Then my district required all students use writing folders organized into a work in progress side and a completed side. A colleague found some with clear plastic pockets on the cover and inside so I could easily customize the fronts and backs with alphabet strips, writing process supports, mobile word walls, etc. These worked pretty well. The kids could more or less manage them and they were durable. However, it got very challenging to keep more than a week or two of writing in them and maintain any organization. So once a month each folder required a lot adult attention to keep this system going. Single pages: I also tried having students turn single "complete" pieces into our classroom parking lot so that I could maintain an ongoing file of critical work, but once again that put the task of organization back on me. It was challenging when kids wanted to use earlier work as a reference. This ended up working really well for things like writing prompt pieces we were required to collect, but not so well for works in progress. 3 ring binders: Enter the three ring binder! These ended up being my personal favorite. The main challenge was teaching children to insert pages without snapping their fingers but honestly, I think that element of "danger" inspired students to pay closer attention to keeping things ordered! I'm guessing the real threat of pinched fingers was a motivator. Like the folders with pockets, I could organize tools using plastic sheet protectors. I found having references at their finger tips increased productivity and focus for my students. The rigid backs were helpful as the notebooks could serve as a clip board or privacy screen. Other tips that help with this were having reinforcing rings handy to patch ripped pages and using a corner shelf unit to store the binders as they can be bulky. I did switch back and forth across systems depending on my students' needs and some years I used more than one system. The most unusual system was for one student who ended up writing a twenty three panel comic adventure! Each panel was a full size sheet of paper, so when taped together (as was deemed necessary for his creative process) his work occupied quite a bit of floor space. We found the best way to store his work was to roll it up and keep it in a canvas bag!
Like many things in education, meaningful learning gets a bit messy! I'm looking forward to reading your comments about paper management solutions and challenges. Here's how this week's lessons can help you address DCIs. 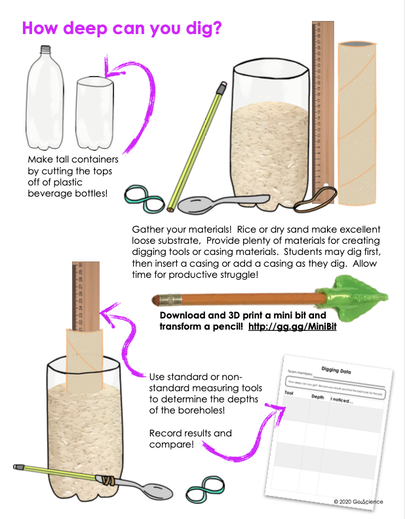 Day 5: How deep can you go? This lesson is another STEM design challenge! Giving students opportunities to address these standards in new and novel ways can build flexible thinking and teamwork! This lesson can help you address the following standards:
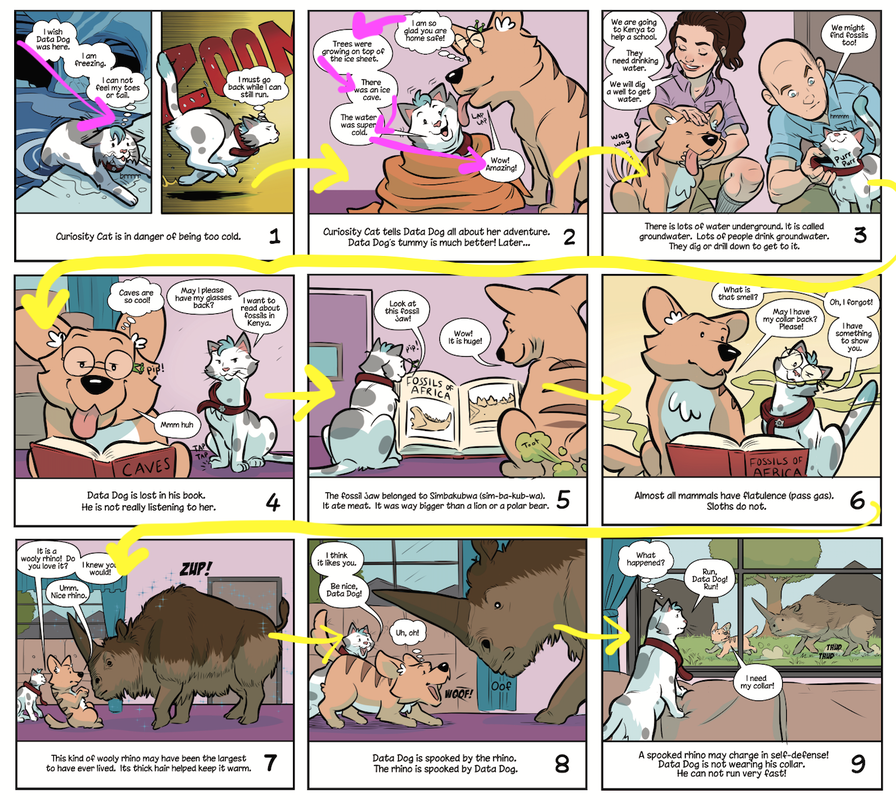
Color communication! First, an announcement! Our comics are now available in a black and white mini-book format!!! I'd like to extend a big thank you to our artist, Ben Matsuya, for so providing these so quickly! Another big thank you goes to super teacher, Kristen Tedesco, for suggesting we provide this format. We've had some great feedback already! Instead of grade level specific tips this time, I thought it would be cool for every grade to stop and think about color and what it communicates. Try this activity! Project or print the comic in black and white BEFORE showing students the color version. Ask them to think about what colors they think Ben might select for each scene. Why would he choose those colors? How do different colors make them feel? If time permits, allow students to color a panel or two but with intention. Ask them to describe WHY they choose to color the panel as they did. Finally compare their colored panels or suggestions to Ben's work. How are they the same or different? Try extending this exercise to web sites, food packages, or advertising. Why do they think the people choose the colors they did? Kids are being marketed to constantly so equipping them with some tools to recognize some non-verbal communication strategies can build an awareness that empowers kids to make choices rather than be manipulated by advertisers.
Make it more real and fuel creative play!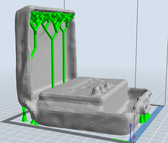 We were able to scan the resistivity meter that our scientist, Mr Ogara, and his crew used to conduct the resistivity tests. His crew loved watching the scanning process! The model is easy to print. We found it best to auto- generate treelike supports to support the lid during printing. I think this would be a great file to print out of student view and use as a mystery object before or after the field mission video. If you are not familiar with using a mystery box or mystery bag for mystery object games read on! The concept is simple. Place an object (such as the 3D printed resistivity meter) in a bag or box. Don't let students see! Then one at a time students can reach in and feel the object. Encourage them to describe one attribute to their classmates. discourage simply guessing. If a student does make a guess encourage them to justify that guess based on the attributes they can feel. It's a quick and easy way to build language and high level thinking skills. If you reduce the size of the resistivity meter and increase the size of mini Beth and Curtis you can build a small play set your students can use as props during dramatic play opportunities. We've heard from a couple of kindergarten teachers that Mini Beth and Curtis have had a number of thrilling adventures in their classrooms!
Tips for reading instruction using our comic!
Kindergarten: Focus on upper and lower case letters. Code It! Project or print one or more panels of this week's comic and challenge students to circle each sound effect and then color code the capital letters using highlighters. Most of the time we read lower case letters. Why do they think Ben made some words have all capital letters? Why did he make some all lower case? Why might he have mixed others up? This activity is a great opportunity to reinforce a basic skill while talking about the craft of writing so learning across the whole spectrum can be meaningfully engaged!
Grade 2: Focus on big words!
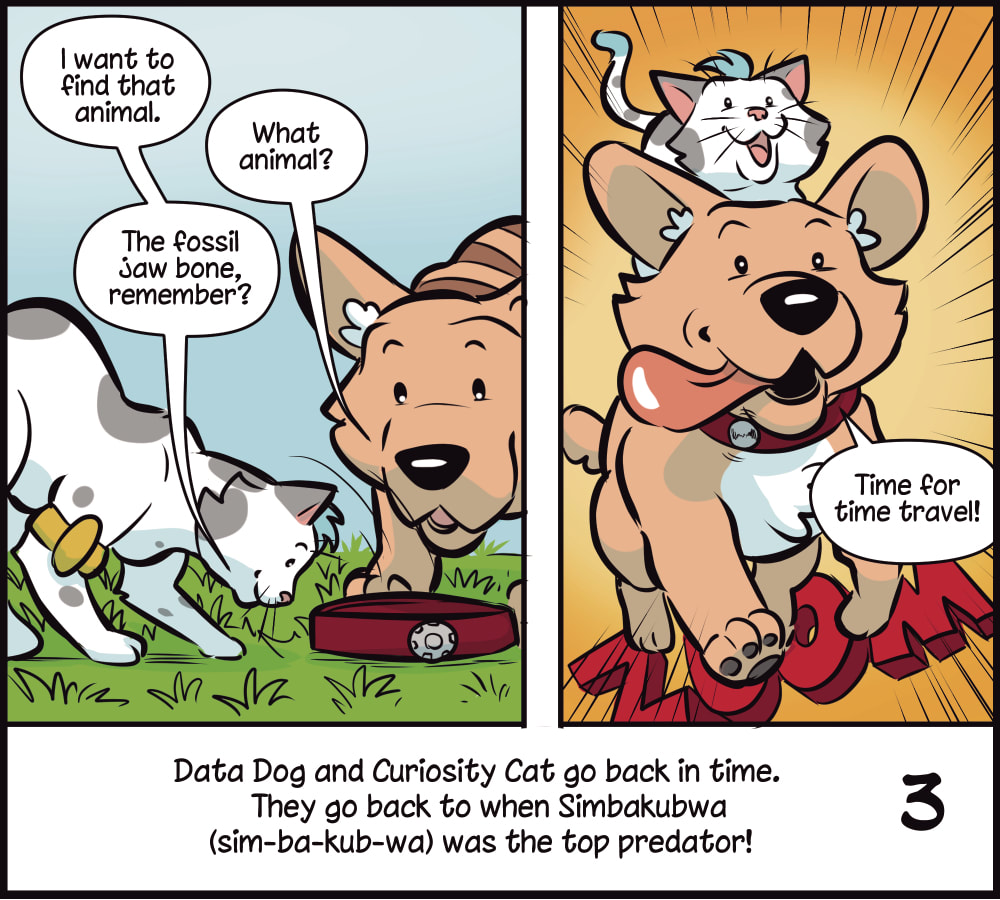
Break it Down! Curiosity Cat and Data Dog encounter a Simbakubwa this week! Wowzers!!! What a critter! What a word! Like many of our bigger words, however, we're provided a help. Simbakubwa is MUCH easer to decode when broken down into syllables like this: sim-ba-kub-wa. What do students notice about each of those syllables? (If needed, give them hints to help them realize each syllable has a vowel. 😉) Challenge them to find other big words in the comic or classroom books and make their own syllable break downs. Dinosaur books are often a GREAT place to look for big words! |
Meet Beth and Curtis!Presidential Award-Winning teacher and hula hoop fanatic, Beth loves bringing real world science to kids! Beth is fascinated by engineering challenges, technology, and outdoor learning spaces. After 25 years teaching kindergarten, she’s excited to share her passion and experience on-line with classrooms from around the world! Archives
May 2021
Categories
All
|
 RSS Feed
